MapReduce in Beam (Python) 2.5
MapReduce
Stamps
Initial conditions
Categories:
Google Cloud
Check project permissions
Before you begin your work on Google Cloud, you need to ensure that your project has the correct permissions within Identity and Access Management (IAM).
-
In the G
), select IAM & Admin > IAM.
-
Confirm that the default compute Service Account
{project-number}-compute@developer.gserviceaccount.comis present and has theeditorrole assigned. The account prefix is the project number, which you can find on Navigation menu > Cloud Overview > Dashboard.
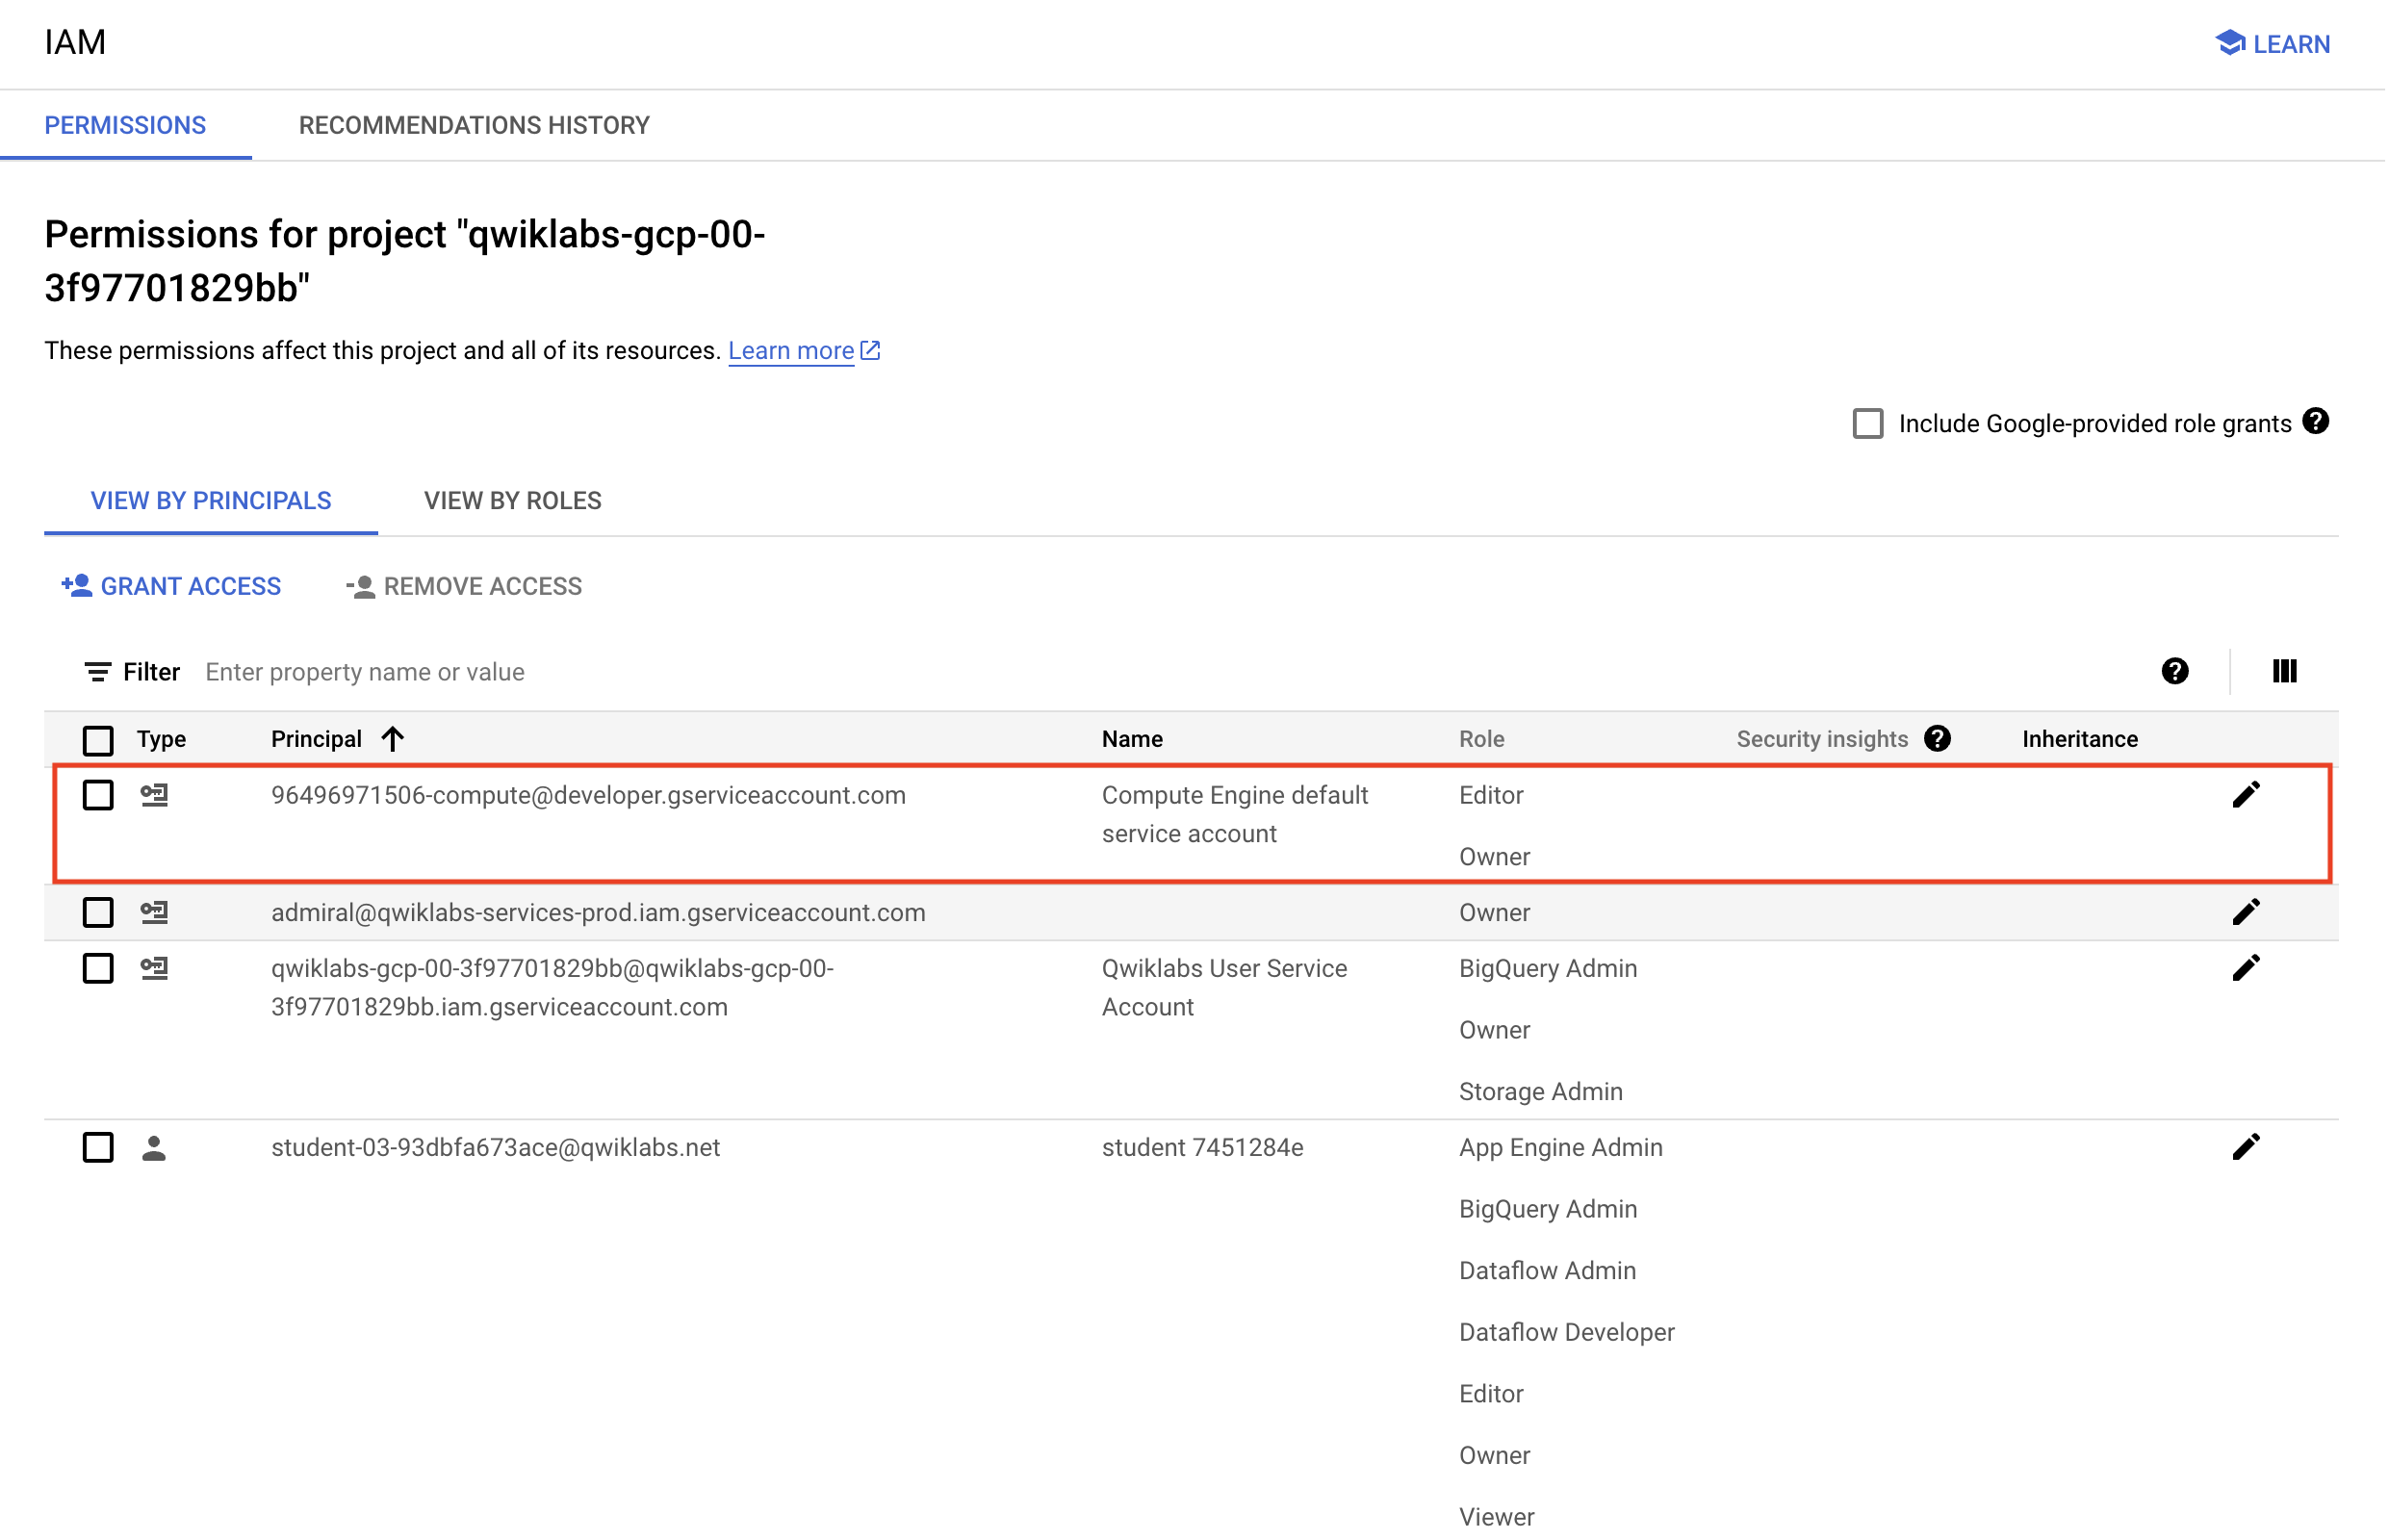
Note: If the account is not present in IAM or does not have the editor role, follow the steps below to assign the required role.
- In the Google Cloud console, on the Navigation menu, click Cloud Overview > Dashboard.
- Copy the project number (e.g.
729328892908). - On the Navigation menu, select IAM & Admin > IAM.
- At the top of the roles table, below View by Principals, click Grant Access.
- For New principals, type:
CODE...
- Replace
{project-number}with your project number. - For Role, select Project (or Basic) > Editor.
- Click Save.
Task 1. Lab preparations
Specific steps must be completed to successfully execute this lab.
Open the SSH terminal and connect to the training VM
You will be running all code from a curated training VM.
-
In the Console, on the Navigation menu (
-
Locate the line with the instance called training-vm.
-
On the far right, under Connect, click on SSH to open a terminal window.
-
In this lab, you will enter CLI commands on the training-vm.
Clone the training github repository
- In the training-vm SSH terminal enter the following command:
CODE...
Task 2. Identify map and reduce operations
- Return to the training-vm SSH terminal and navigate to the directory
/training-data-analyst/courses/data_analysis/lab2/pythonand view the fileis_popular.pywith Nano. Do not make any changes to the code. Press Ctrl+X to exit Nano.
CODE...
Can you answer these questions about the file is_popular.py?
- What custom arguments are defined?
- What is the default output prefix?
- How is the variable output_prefix in
main()set? - How are the pipeline arguments such as
--runnerset? - What are the key steps in the pipeline?
- Which of these steps happen in parallel?
- Which of these steps are aggregations?
Task 3. Execute the pipeline
- In the training-vm SSH terminal, run the pipeline locally:
CODE...
- Identify the output file. It should be output<suffix> and could be a sharded file:
CODE...
- Examine the output file, replacing '-*' with the appropriate suffix:
CODE...
Task 4. Use command line parameters
- In the training-vm SSH terminal, change the output prefix from the default value:
CODE...
- What will be the name of the new file that is written out?
- Note that we now have a new file in the /tmp directory:
CODE...