Serverless Data Analysis with Beam: MapReduce in Beam (Java)
Serverless
Stamps
Initial conditions
Categories:
Google Cloud
Activate Google Cloud Shell
https://www.cloudskillsboost.google/course_sessions/11703049/labs/453518?locale=en
Google Cloud Shell is a virtual machine that is loaded with development tools. It
Google Cloud Shell provides command-line access to your Google Cloud resources.
-
In Cloud console, on the top right toolbar, click the Open Cloud Shell button.
-
Click Continue.

It takes a few moments to provision and connect to the environment. When you are connected, you are already authenticated, and the project is set to your PROJECT_ID. For example:

gcloud is the command-line tool for Google Cloud. It comes pre-installed on Cloud Shell and supports tab-completion.
- You can list the active account name with this command:
gcloud auth list
Copied!
content_copy
Output:
Credentialed accounts:
 - @.com (active)
Example output:
Credentialed accounts:
 - google1623327_student@qwiklabs.net
- You can list the project ID with this command:
gcloud config list project
Copied!
content_copy
Output:
[core]
project =
Example output:
[core]
project = qwiklabs-gcp-44776a13dea667a6
Note: Full documentation of gcloud is available in the gcloud CLI overview guide .
Launch Google Cloud Shell Code Editor
Use the Google Cloud Shell Code Editor to easily create and edit directories and files in the Cloud Shell instance.
- Once you activate the Google Cloud Shell, click Open editor to open the Cloud Shell Code Editor.

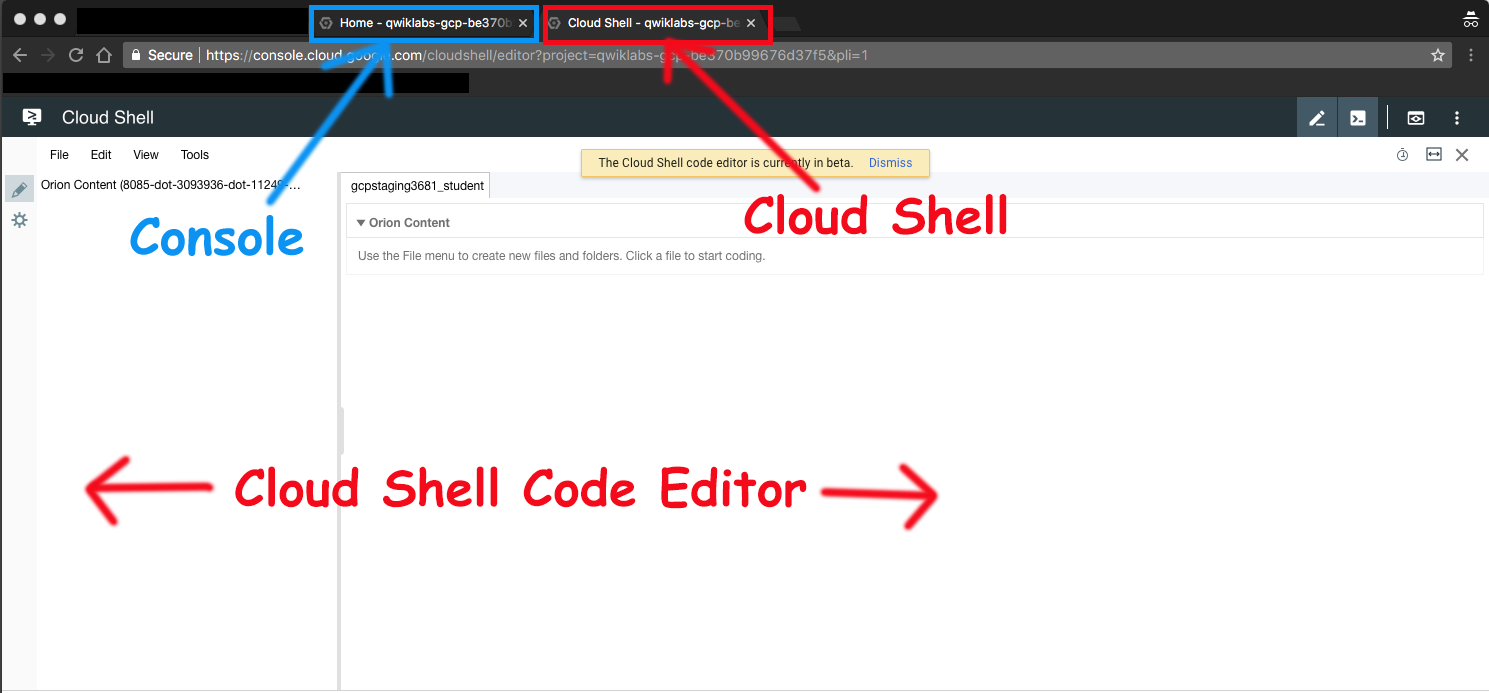
You now have three interfaces available:
- The Cloud Shell Code Editor
- Console (By clicking on the tab). You can switch back and forth between the Console and Cloud Shell by clicking on the tab.
- The Cloud Shell Command Line (By clicking on Open Terminal in the Console)
Check project permissions
Before you begin your work on Google Cloud, you need to ensure that your project has the correct permissions within Identity and Access Management (IAM).
-
In the Google Cloud console, on the Navigation menu (
), select IAM & Admin > IAM.
-
Confirm that the default compute Service Account
{project-number}-compute@developer.gserviceaccount.comis present and has theeditorrole assigned. The account prefix is the project number, which you can find on Navigation menu > Cloud Overview > Dashboard.
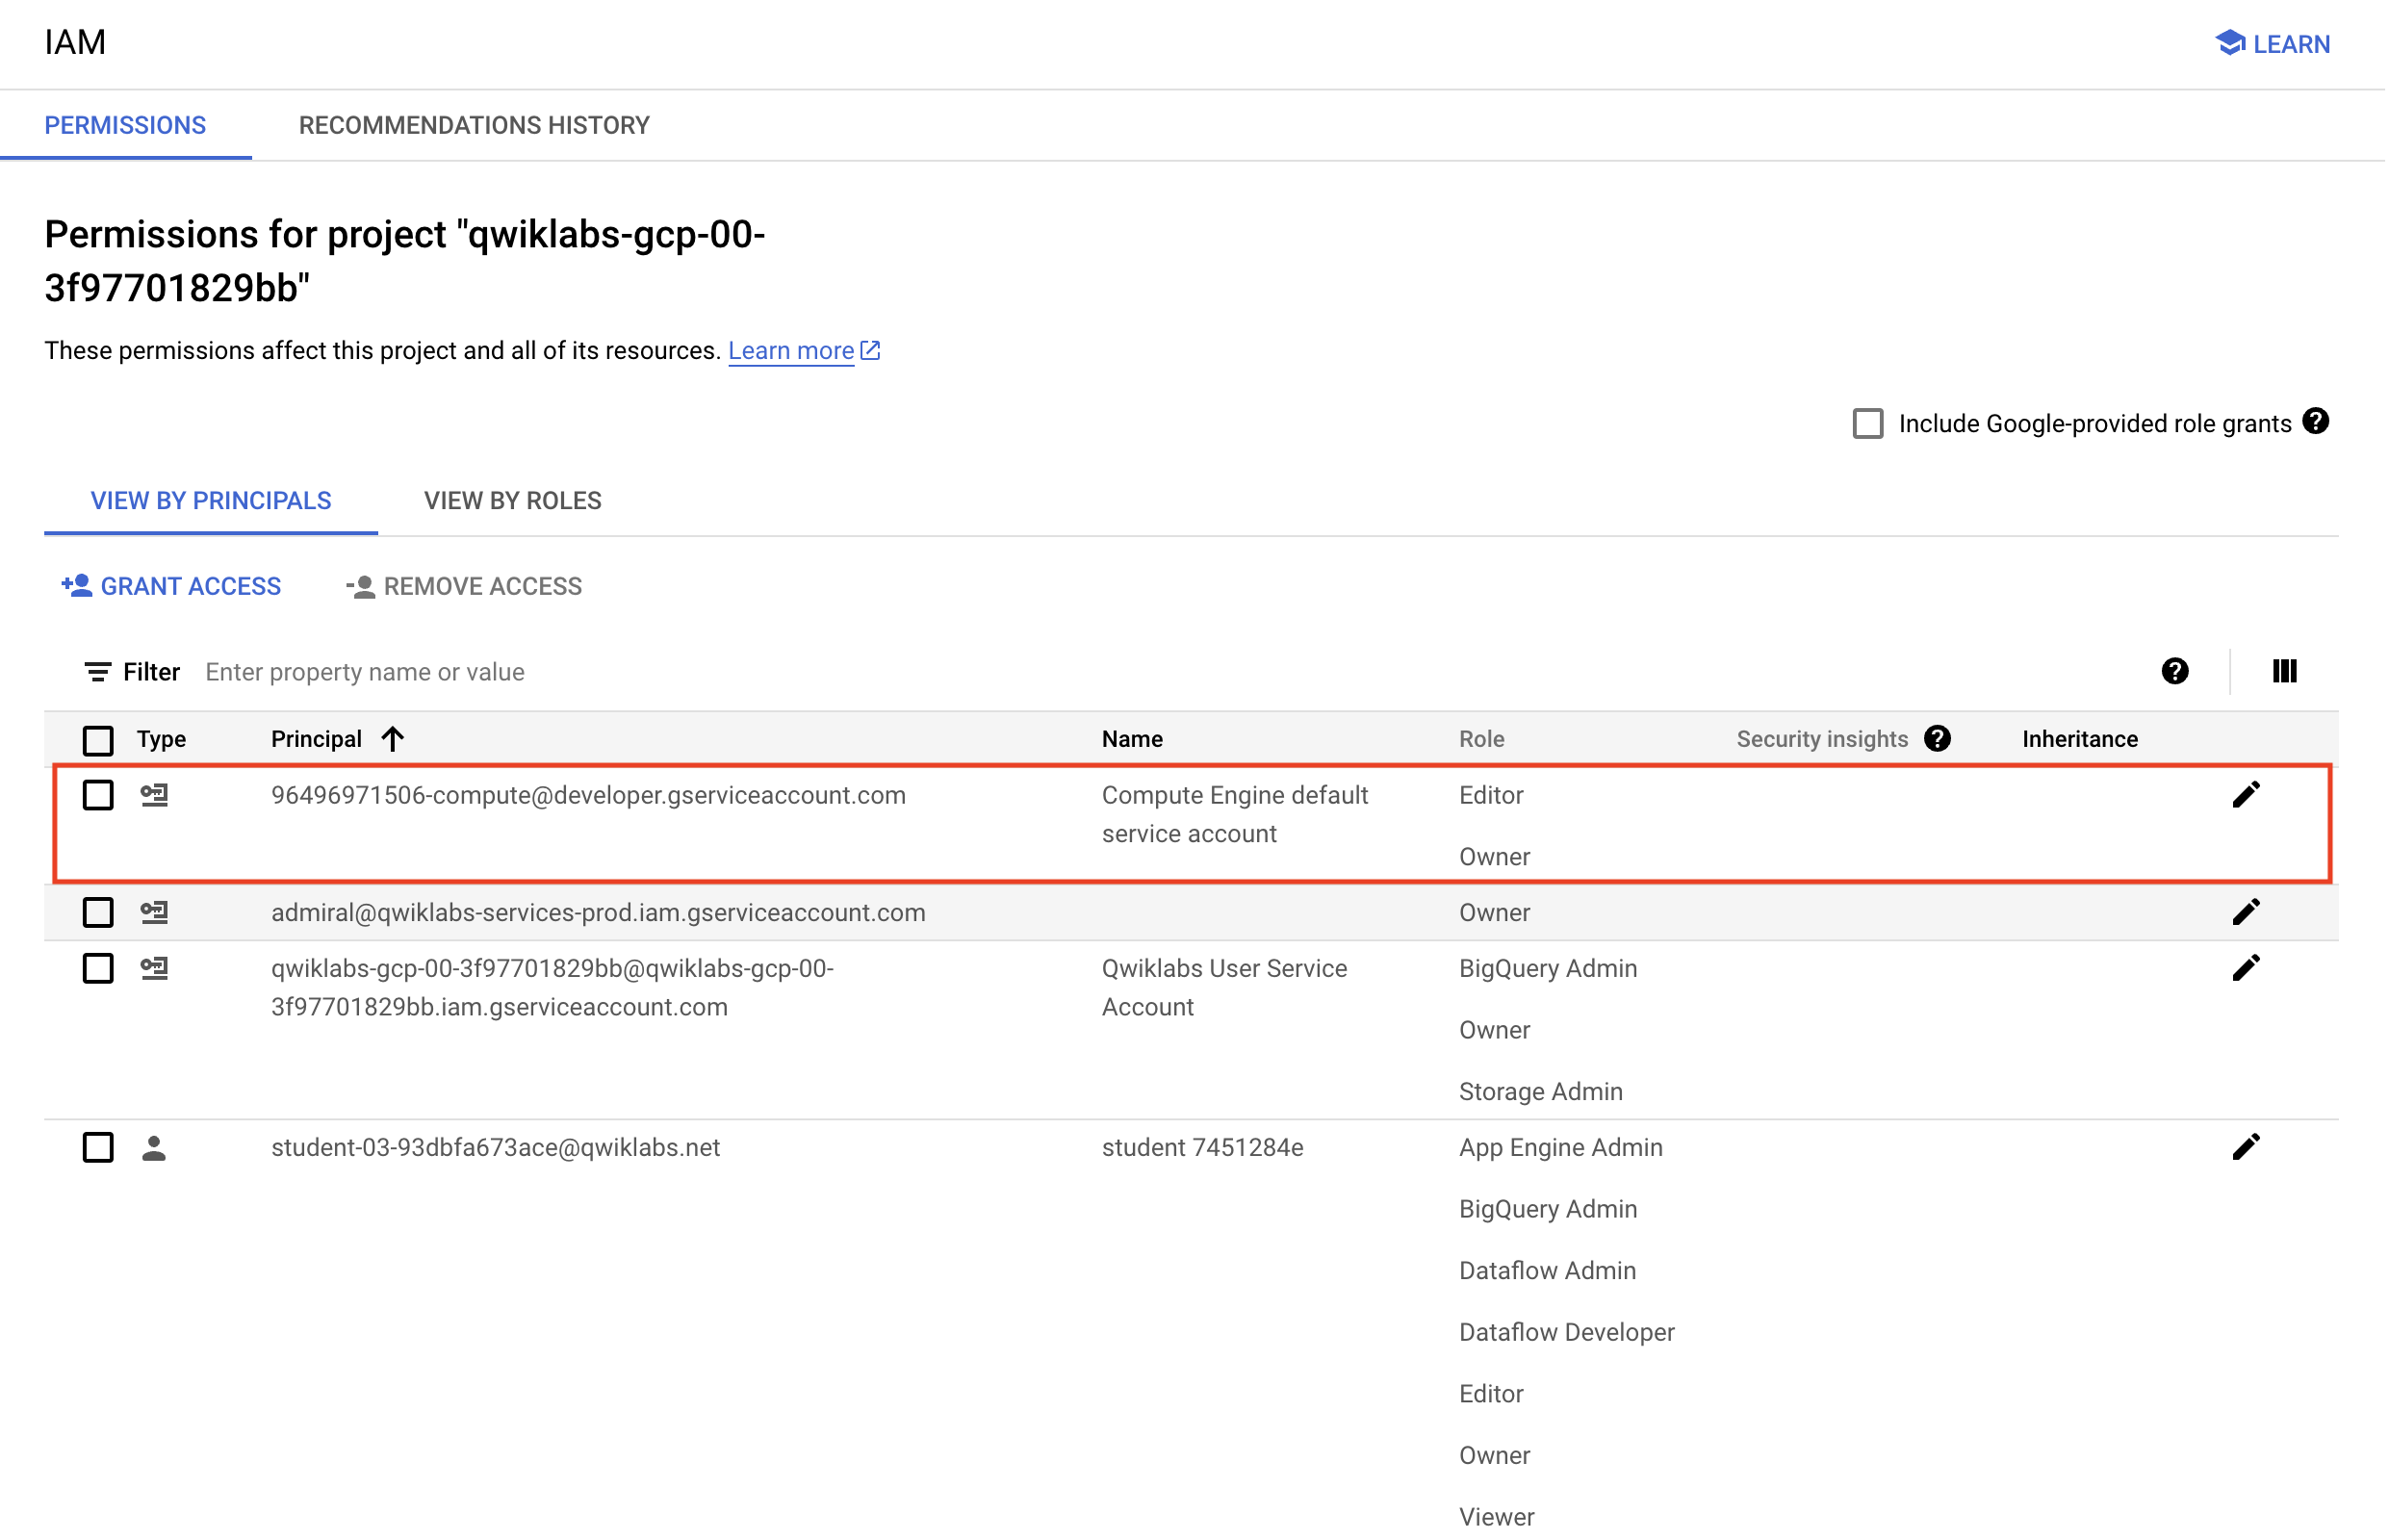
Note: If the account is not present in IAM or does not have the editor role, follow the steps below to assign the required role.
- In the Google Cloud console, on the Navigation menu, click Cloud Overview > Dashboard.
- Copy the project number (e.g.
729328892908). - On the Navigation menu, select IAM & Admin > IAM.
- At the top of the roles table, below View by Principals, click Grant Access.
- For New principals, type:
CODE...
- Replace
{project-number}with your project number. - For Role, select Project (or Basic) > Editor.
- Click Save.
Task 1. Lab preparations
Specific steps must be completed to successfully execute this lab:
-
Create Cloud Storage bucket (which was completed for you automatically when the lab environment started).
-
On the Google Cloud Console title bar, click Activate Cloud Shell. If prompted, click Continue. Clone the lab code github repository using the following command:
CODE...
Task 2. Identify Map and Reduce operations
- In the Cloud Shell code editor navigate to the directory
/training-data-analyst/courses/data_analysis/lab2/javahelp/src/main/java/com/google/cloud/training/dataanalyst/javahelpand view the fileIsPopular.javain the Cloud Shell editor.
Note: Do not make any changes to the code.
Alternatively, you could view the file with nano:
Note: Do not make any changes to the code.
CODE...
Note: Normally, you would develop this Java code in an Integrated Development Environment such as Eclipse or IntelliJ (not in CloudShell).
Can you answer these questions about the file IsPopular.java?
- What getX() methods are present in the class MyOptions?
- What is the default output prefix?
- How is the variable outputPrefix in main() set?
- What are the key steps in the pipeline?
- Which of these steps happen in parallel?
- Which of these steps are aggregations?
Task 3. Execute the pipeline
- Copy and paste the following Maven command in Cloud Shell:
CODE...
Note: It will take 4-5 mintues to complete the process.
- Examine the output file:
CODE...
Copied!
content_copy
Task 4. Use command line parameters
- Change the output prefix from the default value:
CODE...
- What will the name of the new .csv file that is written out be?
- Note that we now have a new file in the /tmp directory:
CODE...
...